Prepare a PNG Logo for SVG Tracing
Prepare simple PNG artwork for SVG tracing: keep transparent holes, preserve white details, remove edge backgrounds, and check a 50 mm export.
Start with a simple logo, icon, or silhouette that you own or have permission to use. This converter follows pixel boundaries and exports filled SVG paths. It cannot recover the original font, layers, or design file. A cleaner input usually matters more than adding more tracing detail.
Prepare the artwork before choosing settings
- Use flat colors and clear edges. Remove compression noise and stray pixels in an image editor first.
- Keep enough pixels to describe narrow strokes and gaps. Enlarging a tiny PNG cannot restore missing detail.
- Crop unnecessary empty margins if the size of the drawn object matters. The output width includes the original image canvas, including transparent padding.
- Keep your original PNG and compare the trace at the same zoom and background. A successful conversion is not a guarantee that the shape is suitable for manufacturing.
Keep transparent holes distinct from white paint
Try our original transparent ring PNG in PNG to SVG. Its center is transparent, so the Black & White trace should keep a hole. View it on a checkerboard and a contrasting solid background to check the hole. The example is procedural artwork, not a third-party logo.

For a colored logo with white lettering, try the original flat-color PNG. Choose Color Logo to keep white as a real color. A white shape and an empty hole can look identical against a white preview but behave differently when edited or cut.

Remove only the background you intend to remove
The Advanced setting Remove edge-connected white background removes near-white pixels connected to an image edge. It keeps enclosed white details. Try the self-made white-background and enclosed-white example with Color Logo, then compare before and after. Check narrow gaps: a white area connected to the edge through a gap is part of the background under this rule.

Keep transparency is enabled by default. Turning it off composites on white before tracing; that does not automatically remove a background. Semi-transparent edges become simplified opaque regions according to the alpha threshold, not faithful translucent gradients.
Choose a trace without mistaking it for a machine toolpath
- Black & White traces dark foreground shapes after thresholding. Color Logo keeps a limited set of flat color regions.
- Craft Outline is a contour-cutting aid and exposes physical dimensions; the export still consists of filled paths. It is not an automatic centerline or single-line tracing algorithm.
- A thick stroke has two boundaries. An enclosed letter can contain an island that falls out of a stencil unless the design includes bridges.
- Do not add kerf compensation, automatic bridges, or self-intersection repairs without first defining the material and machine workflow. Those operations are not performed by this tool.
Check a 50 mm file before any cutting
Use our original 50 mm calibration square to check how your software reads document and object dimensions. The square has no padding. Compare it with the 50 mm canvas ring example, whose drawing is smaller than the document because its PNG has transparent margins. The Output width setting describes the entire canvas, not a cropped object bounding box.

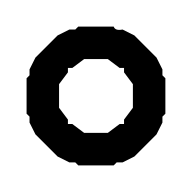
For your own trace, open Output dimensions, choose mm, enter 50, and convert again. Inspect closed contours, hole retention, repeated or overlapping boundaries, and the imported physical dimensions in your actual software. Different color layers can intentionally share a boundary; that is not the same as an unwanted duplicate cut.
No import or physical cutting result in Inkscape, Cricut, or Silhouette is certified by these sample files. Import them in the software and version you actually use, record what happens, and test on scrap material before committing a real design.
Why photographs are a poor starting point
Photographs contain gradients, shadows, textures, and many tiny regions. Tracing them can create a large SVG with fragmented paths and little editing value. Use the original PNG for photographic display, or prepare a deliberate simplified illustration first. Fewer colors and more smoothing can reduce complexity while removing details.
The tool accepts one static PNG up to 15 MiB, 8192 pixels on either side, and 16,777,216 total pixels. The displayed working resolution may be reduced to 2048 pixels on its longest side, or 1536 in Lower memory mode. Check fine details after that change. Conversion and downloads stay local in the isolated workspace; the explanatory guide itself is an ordinary site page.